
In this tutorial, You will learn some simple steps to integrate Google reCAPTCHA using PHP in any type of HTML form like contact form, signup/registration form more.
Google provides the best reCAPTCHA v2 verification API with a checkbox widget to protect forms from spam.
If you use PHP Google reCAPTCHA v2 Verification code in your website form then form input data can’t be submitted unless users verify themself through the reCAPTCHA checkbox. Even only humans can click the reCAPTCHA checkbox and prove that they are not a robot without solving captcha questions.
How to Integrate Google reCAPTCHA in Forms in PHP
Here, I will learn you to integrate google reCAPTCHA in a contact form. once you understand it, you can implement ReCaptcha in other forms.
Note – Google reCAPTCHA works only on the live domain. It will not work on Localhost
1. Create SQL Table
Here, I have created a table named contact with four columns such as id, fullName, email, & message
CREATE TABLE `contact` (
  `id` int(10) UNSIGNED PRIMARY KEY NOT NULL AUTO_INCREMENT,
  `fullName` varchar(50) DEFAULT NULL,
  `email` varchar(50) DEFAULT NULL,
  `message` varchar(250) DEFAULT NULL
);
2. Connect PHP to SQL Database
Connect PHP to your own database, here, I have created a database named codingstatus
<?php
$hostName = "localhost";
$userName = "root";
$password = "";
$databaseName = "codingstatus";
 $conn = new mysqli($hostName, $userName, $password, $databaseName);
// Check connection
if ($conn->connect_error) {
  die("Connection failed: " . $conn->connect_error);
}
?>
3. Get Google reCAPTCHA API Keys
- First of all, Go to Google reCAPTCHA Admin Console to register your website domain
- You will be asked to log in with your existing Gmail account. If you are already logged in to your Gmail account then you will be directly redirected to the dashboard of reCAPTCHA Admin Console.
- Then You have to fill in the following details shown in the figure
- Enter anything related to your form in the Label input Field
- Select the reCAPTCHA v2> “I am not a robot” Checkbox
- Enter your website domain in the domains input field.
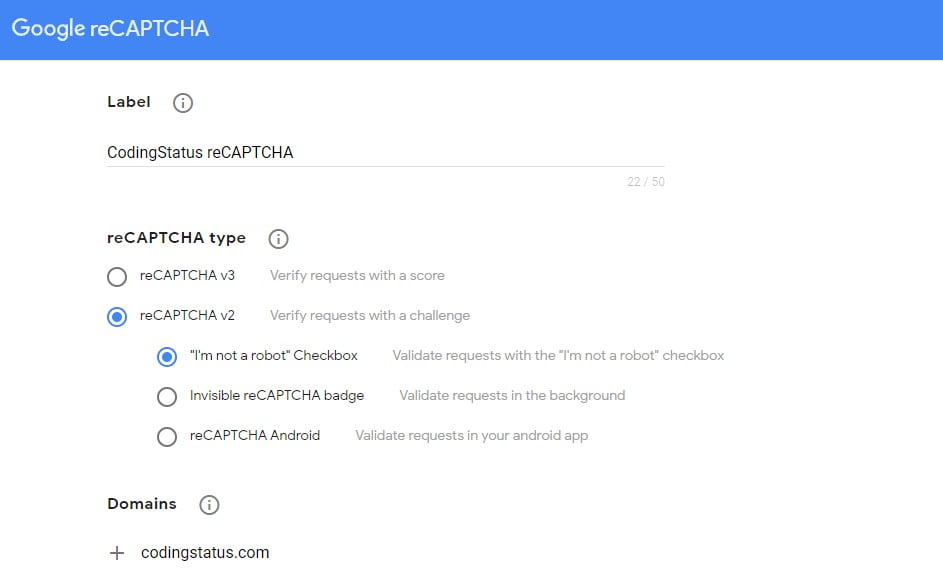
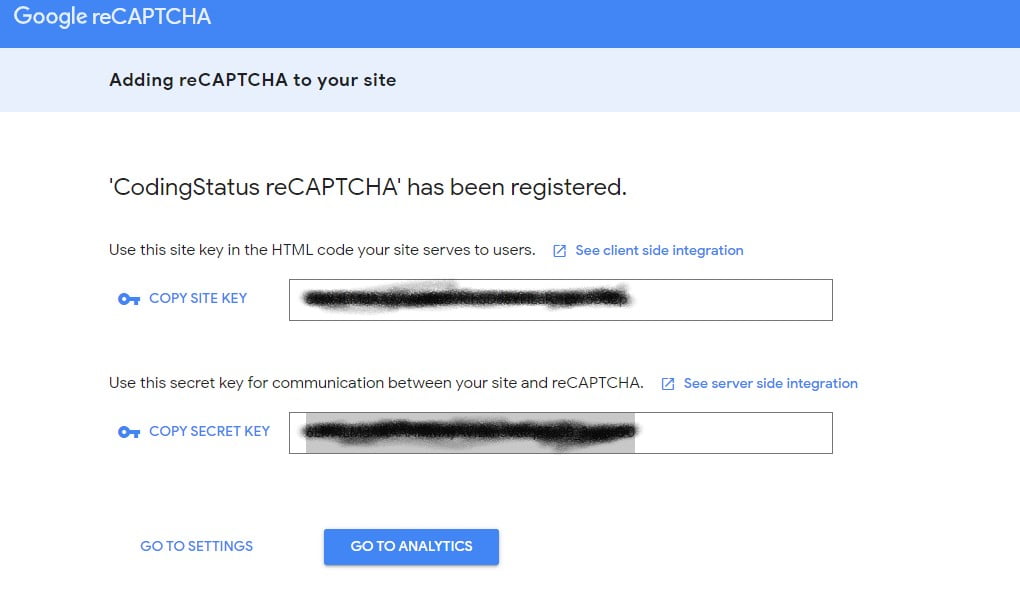
- After filling in all the required details, click on the submit button
- Then you will get SITE KEY and SECRET KEY. After that copy both API and paste into reCAPTCHA Widget & reCAPTCHA API PHP code respectively
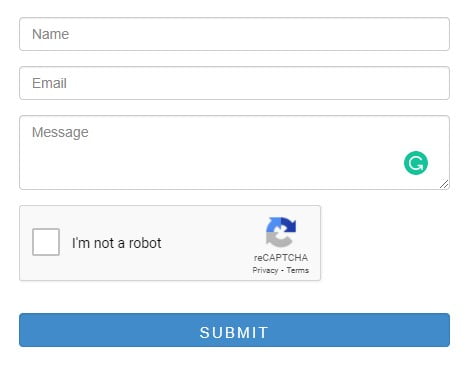
4. Include Google reCAPTCHA Widget to the Form
You will have to include the following line of code in your form to get the ReCaptcha checkbox widget.
Include the following javascript Recaptcha API link
<script src="https://www.google.com/recaptcha/api.js" async defer></script>
Also, include the following code to get the Recaptcha checkbox
<!-- Google reCAPTCHA box --> <div class="g-recaptcha" data-sitekey="ENTER_YOUR_SITE_KEY"></div>
Note – You must assign SITE KEY to the data-sitekey attribute.
File Name – contact-form.php
<?php
include("insert-data.php");
?>
<!DOCTYPE html>
<html lang="en">
<head>
  <link rel="stylesheet" href="https://maxcdn.bootstrapcdn.com/bootstrap/4.5.2/css/bootstrap.min.css">
</head>
<body>
<div class="container">
 <div class="row">
   <div class="col-sm-4">
    <h3 class="text-primary"> Contact Form</h3>
    <p><?php echo !empty($result)? $result:''; ?></p>

       <!--=================HTML Form=======================-->
      <form method="post" >
        <div class="form-group">
          <input type="text" class="form-control" placeholder="Full Name" name="fullName">
       </div>

        <div class="form-group">
          <input type="email" class="form-control" placeholder="Email Address" name="email">
       </div>
        <div class="form-group">

       <textarea class="form-control" name="message" placeholder="Message"></textarea>

       </div>
     <!-- Google reCAPTCHA box -->
    <div class="g-recaptcha" data-sitekey="ENTER_YOUR_SITE_KEY"></div>

  <button type="submit"  name="submit" class="btn btn-primary">Save</button>
  </form>
    <!--======================== HTML Form============================ -->
   </div>
   <div class="col-sm-8">

   </div>
   </div>
</div>
<script src="https://www.google.com/recaptcha/api.js" async defer></script>
</body>
</html>
5. Integrate Google ReCAPTCHA
I have written some lines of PHP code within a custom function GoogleReCaptcha() that will validate and return response.
Note – You must assign SECRET KEY to the variable $secretKey
File Name – google-recaptcha.php
<?php
function GoogleReCaptcha(){

   // Validate reCAPTCHA box
   if(isset($_POST['g-recaptcha-response']) && !empty($_POST['g-recaptcha-response'])){

    $secretKey = 'ENTER_YOUR_SECRET_KEY';
    $getResponse = file_get_contents('https://www.google.com/recaptcha/api/siteverify?secret='.$secretKey.'&response='.$_POST['g-recaptcha-response']);
     $responseData = json_decode($getResponse);

    }else{
     $responseData = '';
    }
}

?>
6. Insert Data after reCAPTCHA Verification
You can use this code to insert input data into the database after Recaptcha verification. But before using it, you should understand the following points –
- First of all, include the database.php and google-recaptcha.php
- If all the input field is not empty then call the GoogleReCaptcha() and assign it to $googleReCaptcha
- If $googleReCaptcha is not empty then check $googleReCaptcha->success using if-else condition
- If $googleReCaptcha->success is true then call insert_data($conn, $inputData) to insert data into the database.
File Name – insert-data.php
<?php
include("database.php");
include("google-recaptcha.php");
extract($_POST);
if(isset($submit)){

if(!empty($fullName) && !empty($email) && !empty($message))
{
  $inputData = [
    'fullName' => validate($fullName),
    'email'    => validate($email),
    'message'  => validate($message)
  ];
 $googleReCaptcha = GoogleReCaptcha();

 if(!empty($googleReCaptcha))
 {
  if($googleReCaptcha->success)
  {
    $result= insert_data($conn, $inputData);
  }else{
    $result="ReCaptcha verification failed, please try again";
  }

 }else{
  $result = "ReCaptcha Box must be checked";
 }
}else{
 $result =" All Fields are Required";
}


}

function insert_data($conn, $inputData){

    $query  = "INSERT INTO contact(";
    $query .= implode(",", array_keys($inputData)) . ') VALUES (';
    $query .= "'" . implode("','", array_values($inputData)) . "')";
    $execute= $conn->query($query);
   if($execute=== true){
    $msg= "Data was inserted successfully";
   }else{
    $msg= mysqli_error($conn);
  }
 return $msg;
}

function validate($value) {
  $value = trim($value);
  $value = stripslashes($value);
  $value = htmlspecialchars($value);
  return $value;
}

?>