
In this tutorial, You will learn to load records on a select box using ajax, PHP & MySQL with some simple steps. These steps are very easy to understand and implement in web applications.
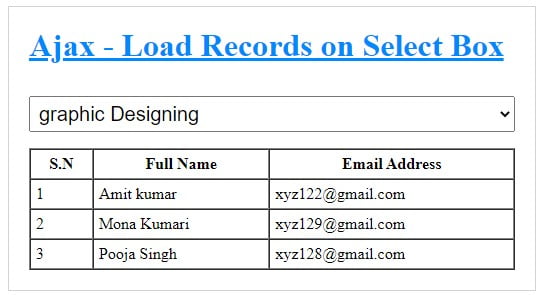
Let’s know how to work it, When you select an option of the dropdown then data will be displayed in a table without reloading the web page.
Here, I have displayed some students’ records in an HTML table based on their courses. Once you learn it, you will easily customize it according to your project requirement.
Display Data From Database Based on Dropdown Selection using Ajax in PHP
Before getting started its coding, you should create the following folder structure –
codingstatus/
     |__ database.php
     |__ ajax-script.php
     |__ display-data.php
     |__ display-script.php
1. Create a Database & Table
First of all, Create a MySQL database with the name ‘codingstatus’
Database Name – codingstatus
CREATE DATABSE codingstatus;
Create a table with the name of ‘course’ to insert the course name
Table Name – courses
CREATE TABLE `courses` (
`id` int(10) UNSIGNED PRIMARY KEY NOT NULL AUTO_INCREMENT,
`courseName` varchar(255) DEFAULT NULL
);
Also, create another table with the name of ‘students’
Table Name – students
CREATE TABLE `students` (
`id` int(10) UNSIGNED PRIMARY KEY NOT NULL AUTO_INCREMENT,
`fullName` varchar(255) DEFAULT NULL,
`courseName` varchar(255) DEFAULT NULL,
);
2. Connect PHP to Database
Now, Connect the database to display data based on dropdown selection
File Name – database.php
<?php

$hostName = "localhost";
$userName = "root";
$password = "";
$databaseName = "codingstatus";

 $conn = new mysqli($hostName, $userName, $password, $databaseName);
// Check connection
if ($conn->connect_error) {
  die("Connection failed: " . $conn->connect_error);
}

?>
3. Insert Data into a Table
After creating the database & table, you have to insert data into both tables. If you don’t know, you can do it with the help of the following article –
Insert Select Option Value with another input value using PHP & MySQL
4. Create a Select Box
To display data from the “courses” table in the database, you have to follow the following steps –
Step -1: Include the database.php file
Step-2: Create a select option input field with the name=”courseName” and onclick=”loadData()”. Where loadData() is explained in the next step.
Step-3: Also, create a submit input field with the name=”submit”
Step-4: Fetch ‘courseName’ from ‘courses and display it in the select option
Step-5: Create a div with id=”displayData”
Step-6: Include jQuery CDN
File Name – display-data.php
<?php
include("database.php");

?>
<form action="" method="post">
<select id="courseName" onchange="loadData()">
    <option value="">Select Course</option>
    <?php
    $query ="SELECT id, courseName FROM courses";
    $result = $conn->query($query);
    if($result->num_rows> 0){
        while($optionData=$result->fetch_assoc()){
        $option =$optionData['courseName'];
        $id =$optionData['id'];
    ?>
    <option value="<?php echo $id; ?>" ><?php echo $option; ?> </option>
   <?php

    }}
    ?>
</select>

</form>
<!-----display data-->

   <div id="displayData">
   </div>
<script src="https://ajax.googleapis.com/ajax/libs/jquery/3.4.1/jquery.min.js"></script>

<script type="text/javascript" src="ajax-script.js"></script>
5. Load Records on Select Box
In this step, you have to write jquery ajax code to load records while you change the dropdown option.
Step-1: Create a custom function loadData() and implement the next steps within it.
Step-2: get option id using $(“#courseName”).val() and store it in a variable id
Step-3: declare the following points within the $.ajx({})
- type: post
- url : display-script.php – this file is explained in the next step.
- data: {courseId: id}
- success: function(){}
File Name – ajax-script.php
var loadData = function(){

   const id = $("#courseName").val();

    $.ajax({
        type: "post",
        url: "display-script.php",
        data:{courseId:id},
        dataType: "html",
        success: function(data){

           $("#displayData").html(data);
        }
    });
};
6. Fetch Records From the Database
To display data in an HTML table, you will have to follow these steps –
Step-1: Include the ‘database.php’
Step-2: Create an HTML table with the three columns like s.n, full name, & course name
Step-3: display data in HTML table using foreach loop
File Name – display-script.php
<?php
include("database.php");

/// edit data
if(isset($_POST['courseId'])){
    $courseId= $_POST['courseId'];

   $fetchData =fetchDataById($courseId);
   displayData($fetchData );

}

function fetchDataById($courseId){

    global $conn;
  $query ="SELECT fullName, emailAddress FROM students WHERE courseId='$courseId'";
    $result = $conn->query($query);
    if($result->num_rows> 0){
      $students= mysqli_fetch_all($result, MYSQLI_ASSOC);
    }else{
     $students=[];
    }
    return $students;
}
function displayData($fetchData){
 echo '<table border="1" cellspacing="0" cellpadding="5">
        <tr>
            <th>S.N</th>
            <th>Full Name</th>
            <th>Email Address</th>

        </tr>';
 if(count($fetchData)>0){
      $sn=1;
      foreach($fetchData as $data){
  echo "<tr>
          <td>".$sn."</td>
          <td>".$data['fullName']."</td>
          <td>".$data['emailAddress']."</td>

   </tr>";

  $sn++;
     }
}else{

  echo "<tr>
        <td colspan='7'>No Data Found</td>
       </tr>";
}
  echo "</table>";
}
?>